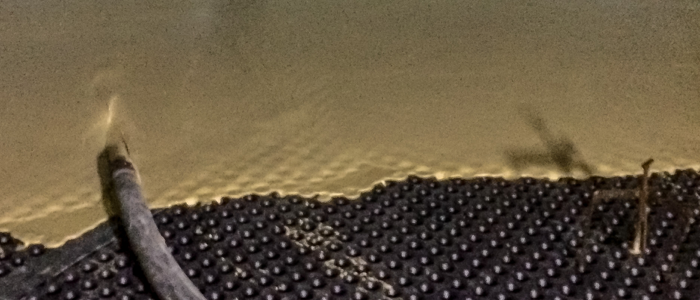
Because liquid screed is so much easier to lay than traditional sand and cement screed, this has led to people thinking that at UK Screeds we simply send our mixer truck to site, pump the screed into position on the substrate, it levels itself (it is sometimes called self-levelling screed), and that’s the lot. Off we go.
If only everything were that simple!
There is a lot more to installing a liquid screed than that, especially if, as is usually the case today, insulation and underfloor heating are going to be laid at the same time.

Before even starting any work, the building must be made weathertight. The roof should be in place and all the external doors and windows fitted. If they are not, the openings have to be covered with clear polythene. Then the whole of the substrate must be cleared of any debris and dust.
Before installing any liquid screed in Oxfordshire – or anywhere else – it is essential that the preparation work is undertaken to the highest standard.
The insulation boards are usually of something such as expanded polystyrene, and any high points on the substrate must be levelled off so that the boards lay flat. Where there are service pipes, such as gas for example, running over the substrate, the insulation boards must have a groove cut into them to accommodate the pipes rather than laying the boards on top of them. The boards must be stable when walked on.
When the insulation boards are in place, any vertical surface such as walls, stairs, and so on, that come into contact with the screed must have a foam strip applied to it to allow for any slight expansion which might occur as the screed dries.
Next, a tanking membrane of heavy polythene must be laid over the insulation boards. This prevents any screed from leaking when it is poured. The membrane must be taken up to the top of the edging strip on the walls as a minimum and taped along the top edge. There must be no creases or punctures in the membrane and all joints must overlap by at least 100mm. There also needs to be enough slack where the membrane meets the walls, etc., so that the screed can form a sharp right-angle.
The next job is to install the heating pipes or cables on top of the membrane. The staples or screws which are used to hold the cable or pipes down will puncture the membrane but will seal themselves so there will be no leaks. Whether using cables or pipes, they must be fixed at intervals of no greater than 300mm. If any lengths are longer than this, the cables or pipes will float up to the top of the screed. Where heating pipes are being used, the pipes must also be filled with water prior to the screed being poured, for the same reason. They also need to be pressure-tested in order to ensure that there are no leaks.
Only now can we begin to lay the screed. This must be to a depth of 30mm – 35mm where it is laid on the polythene directly on to the substrate. However, when floating on insulation in a domestic property, the depth must be 40mm – 45mm and in commercial properties 45mm – 50mm. the cover over the heating pipes/cables must be minimum 30mm.
First, we have to set the levels. We do this by working from a datum point, which is usually the stairs or a door. Then we install tripods, which are levelling gauges, and set them using a laser.
Only now can we begin to pump in the screed. When this is completed, we remove the levelling gauges and then, using a dappling bar, we remove any air bubbles by dappling it in two directions.
The screed can now be left to dry and will be able to be walked on in 24 – 48 hours.
Even now, we haven’t finished, because the screed will form a layer of laitance on the surface as it dries. We remove this by sanding the whole floor between 7 and 10 days after the screed is poured.
And you thought that we at UK Screed just turned up with our mixer truck, poured the screed, and went off for a pint……………..!!


