
Most individuals are familiar with the fundamental process of building a structure. Most people don’t realise, though, that there are still a few more things to keep in mind and actions to do.
For instance, you could think of your home’s floor as merely a flat surface. In actuality, nevertheless, there are several steps to take to guarantee a stable, level, and long-lasting floor.
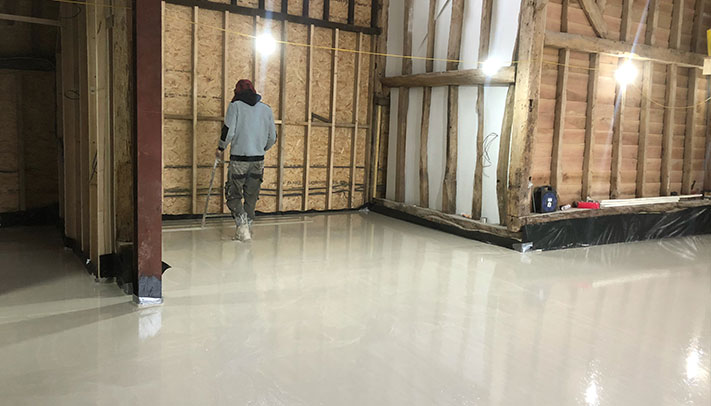
One of the common tasks to finish on floors for commercial or residential projects is installing a layer of floor compound in Suffolk. This may be difficult if you don’t have the right tools and prior expertise.
In addition to priming, the majority of self-levelling underlayments need that the substrate be clear of any impurities that might prevent the bond from forming, such as adhesive residue, sealants or curing chemicals, oil, grease, loose or peeling paint, or other impurities. To achieve a specified concrete surface profile or use epoxy primers for polished underlayments, mechanical abrasion, also known as shot-blasting, is necessary.
Mixing Self-Leveling Underflooring
Use the water range listed on the package to mix your self-levelling underlayment. The underlayment’s strength will be reduced by overwatering, which can also result in disbanding and cracking. In addition, overwatering the product might cause a white film to develop on the surface of the cured underlayment. It might be challenging to work with and result in uneven surfaces, poor flow, or cracking if the self-levelling underflooring is not correctly mixed.
When barrel mixing, stir at least two bags at a time to guarantee maximum application efficiency. Furthermore, certain SLUs are pumpable. When pumping, extra care must be taken to keep the right proportions of water and avoid overwatering. When pumping self-leveler, go by the equipment and product manufacturer’s guidelines.
Temperature Considerations
Verify that the room’s temperature falls within the permitted range specified by the manufacturer. Extreme temperature variations might have an impact on the product, resulting in longer set times in chilly climates and shorter heal times in hotter ones. The SLU’s flow, operating hours, and set time will all be impacted by temperature and humidity.
The water and powder temperatures are also very important. Product flashing can occur if it is left in the sun or a warm place. When using a heated product—which cannot be avoided—mixing it with cold water might assist solve installation problems. Use bagged or blocked ice in your water barrel to keep the water cool in hot weather.
Using as Advised
Manufacturers will state what the product’s maximum thickness is. Certain materials can be used neat, while others only permit the addition of aggregate (pea gravel) to raise the pour’s depth. For self-levelling underlayment, make sure you use the right size and quantity of aggregate in a single pour. The desired thickness may be reached with two different pours or many lifts without the need for further aggregate. Once the first pour’s SLU is walkable, you may move on to applying the appropriate priming coat for the second pour or lift.
You can treat isolated regions that have depressions deeper than ½” (bird bath) and a very uneven surface separately from the rest of the pour. Applying a constant quantity of self-levelling underlayment throughout the application will facilitate the application process. Manufacturers should always be consulted to get the best product for your needs.
Protecting the Underflooring
During the first two to six hours of curing, all self-levelling underlayments should be shielded from direct air movement (drafts) to prevent an early cure that might cause cracking. The majority of underlayments are often not regarded as ultimate wear layer surfaces. Throughout the last two to four hours of drying, they need to be shielded from heavy buildings. Without protection, traffic can result in uneven surfaces and gouging. Let it cure fully before installing the floor covering to avoid any needless surface damage.
How to Screed a Floor: A Guide
Inadequate floor compound in Suffolk can cause damage over time, even to the point where it splits apart and you have to redo the laborious work. Even before you prepare the floor for screeding, you must be well-prepared for the work if you are going to do it yourself.
1. Separate the Space
The floor you want to screed is first divided into parts. Use timber pieces that are straight and long, equal to the height of the layer you intend to screed. Ensure that these fragments are moist enough to be taken out later.
2. Apply a Screed Layer
Start by applying a level layer of screed mixture to the area farthest from the room’s entrance, using a trowel to spread it out and a screed board or straightedge to compact it. Complete the screeding of the area by smoothing the edges with a tamper. Continue in this manner until the entire concrete or sand screed floor is finished. After that, take out the wooden dividers and close up the spaces that remain.
3. Let Go and Heal the Screed
Once the new screed layer is in place and after the concrete has properly bled, you should be able to fix any flaws in it.
An uncured screed layer takes around seven days to cure under a polyethene sheet sealed at the edges. The amount and layer of the screeded area also have a role.
4. Appropriate Cleaning
The floor needs a minimum of three more weeks to dry after curing. It is advisable to forego adding any further flooring layers at this time.
These effective application tips for floor compounds in Suffolk have one thing in common: they all stress the need to read and follow manufacturer directions. To make sure items function as intended, you must carefully study labels and product data sheets.


