
To the best of our knowledge there is no law that says that you must use a floor levelling screed on top of concrete before laying the final floor surface, whatever it may be.
However, unless the floor is going to be used for purely practical purposes such as a factory or warehouse, then a final flooring will be laid that is decorative and practical at the same time. In that case, it is necessary to lay a screed on top of the concrete, because the concrete itself will not be flat or even enough to take the final flooring without causing problems.
This is particularly the case when something such as tiling is going to be fixed with adhesives. If the surface on which the tiles are fixed is not flat, then there is serious danger of them cracking.
In order to lay a screed, there are some things that need to be done first. It is vital that all the preparatory work before installing the screed is carried out to the highest standards. Any dust or debris on the concrete must be removed and the concrete swept clean. The building needs to be weatherproof and all windows and doors must be closed. If the windows have not been fitted, they should be covered with clear polythene sheeting.
If insulation is to be installed on the concrete, the insulation boards must lay flat and be stable when walked on. They need to be butt jointed at staggered intervals. If there are any service pipes running across the concrete, the insulation boards need to have grooves cut into them to accommodate the pipes. Where the insulation boards come into contact with a vertical surface such as a wall they need to have a foam edging strip which allows for any expansion of the screed as it dries, although when using liquid anhydrite screed such as we provide at UK Screeds this will be minimal.
The next job is to lay a tanking membrane over the insulation, and this should be heavy gauge polythene. This will prevent any screed escaping when it is poured. All joints in the polythene must overlap by at least 100mm and be taped, and where the membrane meets the walls it must rise at least as high as the top of the edging strip. The membrane must lay flat and not have any air pockets or voids underneath it. There also needs to be sufficient slack at walls and corners so that the screed can form an exact right angle. Temporary formwork must be used at door openings.
If underfloor heating is being fitted, the pipes or cable must be laid on the polythene membrane and affixed to the insulation boards beneath with screws or staples. There must be fixings no more than 300mm apart because if gaps between them are any longer, the cable or pipe will float upwards in the screed. If a water pipe heating system is being used, the pipe must be filled with warm water before the screed is poured as this will further help to prevent the pipe from floating. The pipe should also be pressure tested to ensure that there are no leaks.
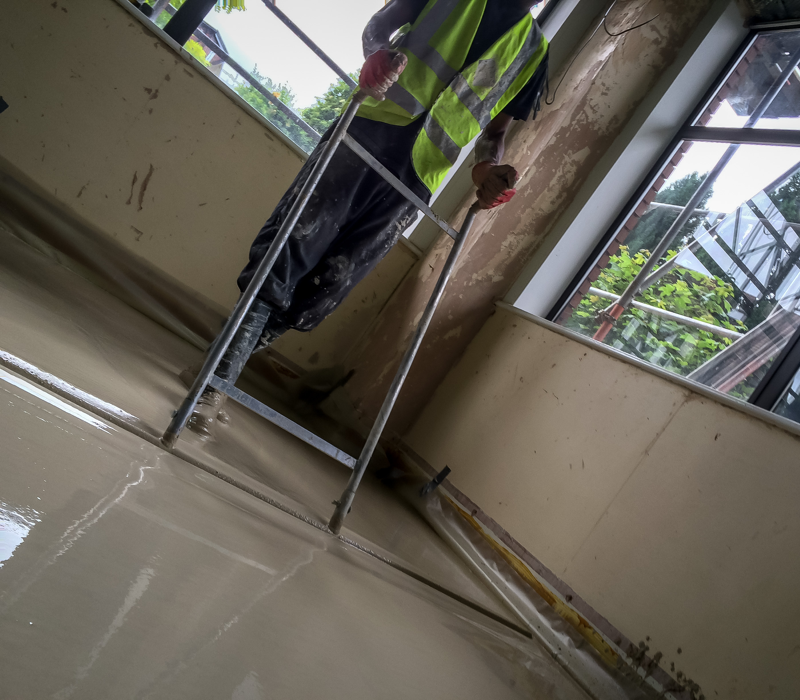
The next job is to set out levelling gauges called tripods, and this is done working from a datum point such as stairs or a doorway. These need to be set to the correct depth using a laser so that the final screed surface is level throughout.
When carrying out floor levelling in Northampton – or anywhere else – only now can the screed be pumped into the building to the depth set by the tripods. When this has been done, the tripods can be removed and any air bubbles in the screed must be removed by agitating with a dappling bar, working in two directions.
When this has been completed, the screed must be left to dry and not walked upon. However, it should be dry enough to walk upon, although not take heavy foot traffic, within 24 -48 hours.
When the screed has dried, there will be a fine layer of particles known as laitance on the surface, and this must be removed by sanding between 7 – 10 days after the screed is poured so that the final flooring can be installed.
So that is what needs to be done if you are going to do it yourself. However, you would probably prefer one of our expert teams at UK Screed to do it for you instead.


