
Liquid floor screeds have greatly increased in popularity over the last few years as they have so many advantages over the traditional sand and cement screeds. To begin with, they are very easy and quick to lay, as they are delivered to site ready mixed and simply pumped into position with a pump and long hose. Because they are in liquid form they flow into position and fill up any gaps or voids, which makes them particularly suitable when underfloor heating is being installed, since they will totally envelop the heating pipes. This makes for excellent thermal conductivity.
Liquid screeds that we install at UK Screeds can be laid more thinly than sand and cement screed and in the case of underfloor heating they only need to cover the pipes to a depth of 25mm, making an overall depth of perhaps 40mm – 45mm. This obviously saves on material costs and also contributes to thermal efficiency. In addition, the thermal conductivity of these liquid anhydrite screeds is about double that of sand and cement so the combination means that less energy is required to heat the room, which results in cost savings and is also more eco-friendly.
Despite all the benefits of these screeds, one needs to be aware of any potential problems. The screeds contain anhydrous (dry) calcium sulphate instead of cement, and when water is added they form calcium sulphate dihydrate, which is known as gypsum. The reaction continues until most of the calcium sulphate binder is used up which is usually within seven days, leaving any remaining water to evaporate through the surface of the screed.
Before laying the final floor surface, it is essential to ensure that the screed is dry enough. It is generally reckoned that anhydrite screeds dry at a rate of 1mm per day to a depth of 40mm and 1/2mm per day thereafter. Thus, a screed of 50mm depth would take 60 days to dry. However, these figures are based on an air temperature of 20°C and relative humidity not greater than 65% – conditions which are unlikely to be average for a period of 60 days or more in the UK, so the actual drying times can be longer.
However, the drying time can be reduced by force drying using the correct dehumidifiers and by also commissioning any underfloor heating that has been installed. Typically, force drying can begin 7 – 10 days after installation, and underfloor heating temperatures can be increased by 5°C per day until the maximum working temperature is achieved. The temperature should not exceed 55°C. The working temperature should be maintained for at least a week before gradually reducing to 15°C to 20°C.
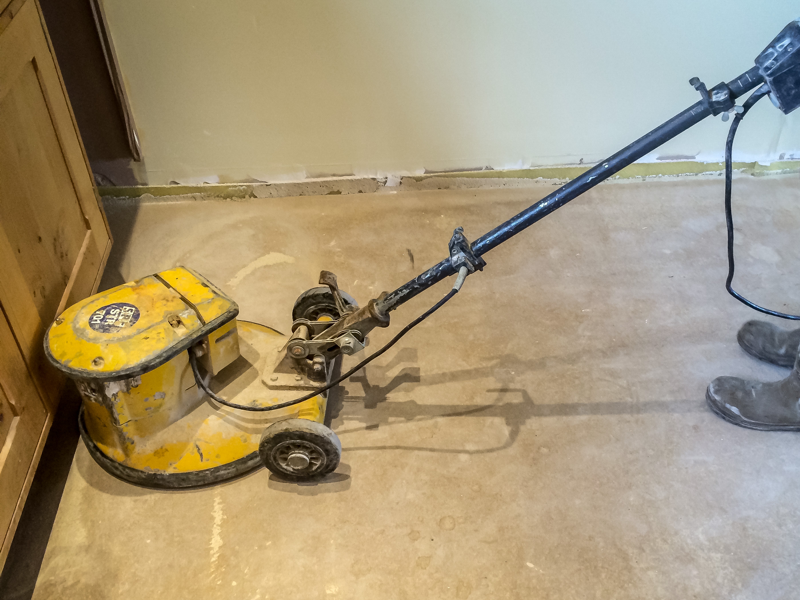
Before any final flooring is laid, the layer of laitance on the surface of the screed must be removed. Laitance is a layer of fine particles that form as the screed dries and must be removed by sanding in Milton Keynes or wherever the project is being constructed. Many of the floor failures that occur are the result of contamination of the adhesive by laitance.
At UK Screeds we remove the laitance by sanding 7 – 10 days after the screed has been poured. The floor must first be cleaned in order to remove any nails or other sharp objects which could damage the sanding machine. We use a rotary floor scarifier fitted with a diamond cutting pad to remove the laitance, and when this has been done the floor is vacuumed.
Before applying any adhesive to the floor, such as when fitting tiles, the surface of the screed should be primed using a suitable primer. This creates an effective barrier and helps to make the surface more stable. It is also important to use the right type of adhesive when fitting tiles because some types can react with the gypsum in the screed and form a mineral called ettringite which can cause a complete unbonding of the adhesive away from the screed.
When fixing tiles, a gap of at least 3mm between them must be left for grouting to be applied. Any movement joints or joints likely to be subject to movement in the screed should correspond with the movement joints in the tile bed.


