
After a liquid screed floor has been poured and has dried off, it will need to be properly prepared to take a floor surface, especially when the floor will be tiled.
We strongly recommend floor sanding should be carried out in all cases, but especially when preparing a liquid screed floor for tiling.
So why would you need to do this?
It is recognised that all Anhydrite liquid screed floors have a weaker surface layer than traditional sand cement screeds and good preparation is required for any floor covering.
Once dry, a liquid screed floor generally has a thin layer of laitance left on the surface which needs to be removed. Furthermore, sanding will remove any imperfections and provide a more durable surface for the floor, thus avoiding potential issues when laying the final floor covering.
Sanding is carried out approximately 5 – 7 days after the installation to ensure the floor is dry, residual moisture content should be less than 0.5%, but it will depend on the screed mix.
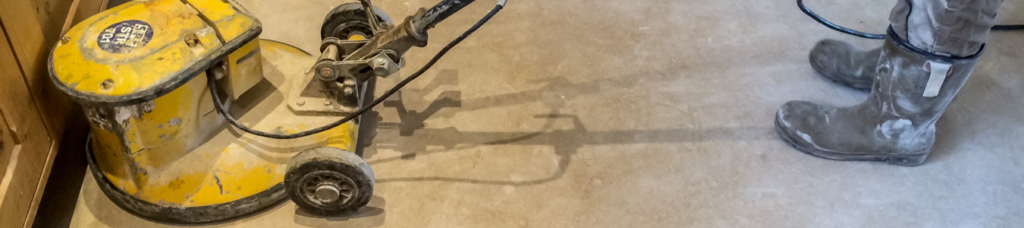
A diamond cutting pad is used to sand the area. Once the area is completely sanded and cleaned, a calcium sulphate compatible primer is applied and allowed to dry to seal the floor. Primer is applied until no more can be absorbed, thus ensuring the area is sealed correctly.
Before tiling, the area must be fully dry to ensure the adhesive will adhere to the tile and floor screed without issue. Tiles should be fixed using a 3mm deep solid layer of adhesive and a minimum 3mm joint should be left between tiles to accommodate movement and for grouting.
Why not call one of our floor screed experts to find out exactly what you need to do to prepare your liquid screed floor for tiling and other floor coverings you may want.


